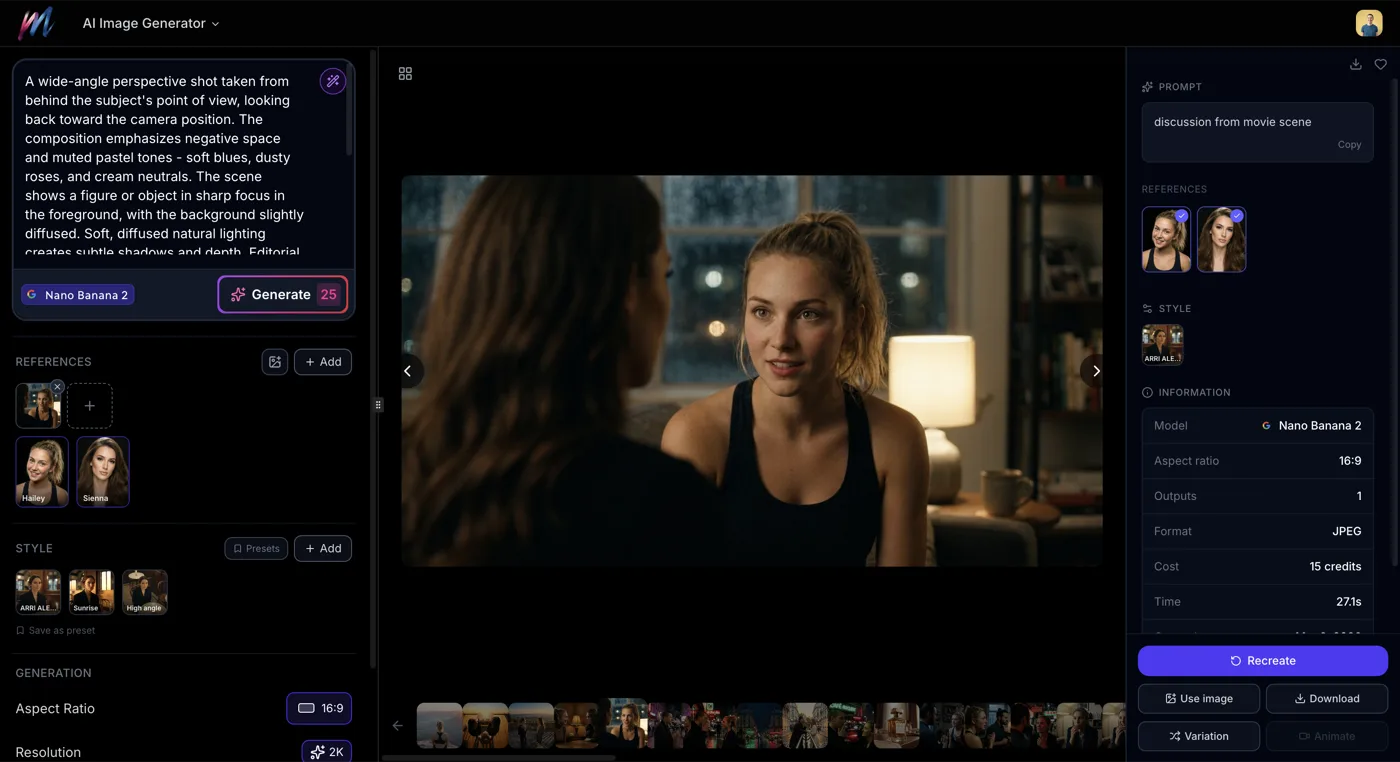
The variation system in Melies lets you explore different visual directions from a single base image. Instead of rewriting prompts and regenerating from scratch, you can change camera angles, swap lighting setups, try different color grades, and explore moods and art styles - all while keeping your subject intact.
This is one of the most powerful features for filmmakers because it mirrors the real production process: you have a scene, and you want to explore how it looks from different angles and in different lighting conditions.
Quick answer: Melies image variations let you right-click any generated image and apply changes from 11 categories with over 130 presets - including 9 camera angles, 23 expressions, 10 lighting setups, and 10 color grades. Each variation keeps your subject intact while applying the selected change, and you can chain multiple variations together.
How Variations Work
- Generate a base image using the
- Right-click on the image to open the context menu
- Select a variation category from the menu
- Choose a specific preset within that category
- Melies generates a new image with the selected variation applied
The new image keeps your subject and general composition but applies the chosen change. You can then apply additional variations to the result, building up layers of visual choices.
The 11 Variation Categories
1. Camera Angles (9 Presets)
Change the perspective from which your scene is viewed.
- Eye Level, High Angle, Low Angle, Overhead/Top-down, Ground Level, Dutch Tilt, Over-the-shoulder, Profile View, Three-quarter
Best for: Exploring how a scene reads from different perspectives. A Low Angle shot of a character makes them feel powerful, while a High Angle makes them feel small. This is fundamental visual storytelling.
2. Shot Sizes (9 Presets)
Control how much of the subject and environment you see.
- Tighter (zoom in), Wider (zoom out), Extreme Close-up, Close-up, Medium Close-up, Medium Shot, Cowboy Shot, Full Body, Wide Shot
Best for: Storyboarding. Cutting between wide establishing shots and close-ups creates visual rhythm. Start wide to set the scene, then move in for emotional moments.
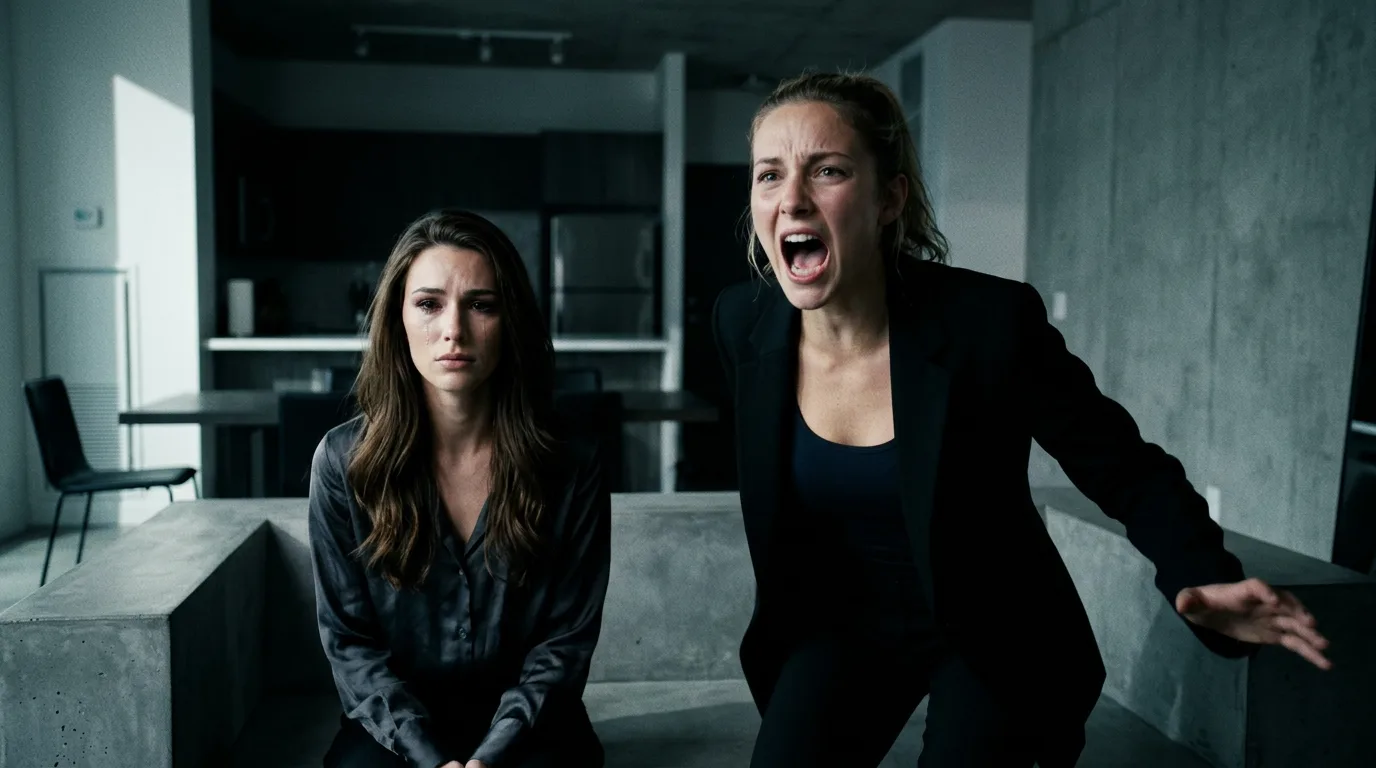
3. Expressions (23 Presets)

Give your characters specific emotions and performances.
- Base: Neutral, Natural Smile, Laughing, Serious, Surprised, Sad, Angry, Crying
- Influencer: Wink, Tongue Out, Duck Face, Blowing a Kiss, Smize, Biting Lip
- Cinema: Villain Smirk, Thousand-yard Stare, Seductive, Horrified, Wonder/Awe, Triumphant, Exhausted, Nervous, Contemplative, Grieving, Skeptical
Best for: Acting beats. Generate the same scene with different expressions to find the perfect emotional moment. The Cinema Pack is designed for dramatic storytelling - pair Villain Smirk with noir lighting for an instant classic.
4. Lighting (10 Presets)
Change how your scene is lit - the single most impactful visual change you can make.
- Soft/Diffused, Hard/Dramatic, Golden Hour, Blue Hour/Dusk, Low-key Noir, High-key Bright, Rembrandt, Backlit/Rim, Candlelight, Neon Glow
Best for: Setting mood and genre. The same scene lit with Golden Hour feels romantic; lit with Low-key Noir it feels like a thriller. Lighting defines genre faster than any other element.
5. Time of Day (7 Presets)
Change the ambient light conditions for outdoor scenes.
- Dawn, Sunrise, Morning, Midday, Golden Hour, Dusk/Blue Hour, Night
Best for: Outdoor scenes and establishing shots. Dawn and Dusk provide the most cinematic natural light. Night scenes paired with Neon Glow lighting create striking urban visuals.
6. Weather (7 Presets)
Add atmospheric conditions to your scene.
- Clear/Sunny, Overcast, Foggy, Misty, Rainy, Stormy, Snowy
Best for: Adding production value and atmosphere. Rainy weather instantly makes any scene more visually interesting thanks to reflections and wet surfaces. Foggy and Misty add mystery.
7. Color Grades (10 Presets)
Apply cinematic color grading to your image.
- Natural, Teal & Orange, Monochrome, Warm Amber, Cool Blue, Filmic/Faded, Bleach Bypass, Sepia, Desaturated, Hyper-saturated
Best for: Establishing the visual identity of your project. Pick one color grade and use it consistently across all your scenes. Teal & Orange is the Hollywood standard; Monochrome makes everything feel timeless.
8. Mood (12 Presets)
Set the overall emotional atmosphere.
- Romantic, Mysterious, Tense/Thriller, Ethereal/Dreamy, Gritty/Raw, Melancholic, Epic/Heroic, Nostalgic, Eerie/Unsettling, Joyful/Uplifting, Serene/Peaceful, Dark/Foreboding
Best for: Quick genre transformation. Apply Tense/Thriller to a mundane scene and it instantly feels like a suspense film. These presets combine lighting, color, and composition adjustments for a complete mood shift.
9. Art Styles (17 Presets)
Transform your image into a different visual medium entirely.
- Cinematic Film Still, Hollywood Blockbuster, Arthouse/Indie, Classic Film Noir, Neo-noir, Documentary, Anime, Studio Ghibli, Makoto Shinkai, Comic Book, Pixar/3D Animation, Oil Painting, Watercolor, Charcoal Sketch, Concept Art, Synthwave/80s, Fashion Editorial
Best for: Creative exploration and unique projects. See what your scene looks like as an anime, an oil painting, or a comic book. Studio Ghibli and Makoto Shinkai presets produce particularly beautiful results.
10. Eras (12 Presets)
Transport your scene to a specific time period.
- Victorian/1880s, 1920s Art Deco, 1950s Post-war, 1960s/Mod, 1970s/New Hollywood, 1980s/Neon, 1990s/Grunge, Early 2000s, Modern Contemporary, Near Future, Dystopian Future, Medieval/Fantasy
Best for: Period pieces and genre exploration. The era preset handles wardrobe, architecture, and color palette automatically.
11. Movie Poster Styles (20 Presets)
Transform your image into a movie poster with a specific visual style.
20 styles including Cinematic, Anime, Retro, Film Noir, Minimalist, Horror, Sci-Fi, Watercolor, Comic Book, Art Deco, Grindhouse, Bollywood, Western, Pixel Art, Surrealist, Documentary, Cartoon, Epic Fantasy, Indie Film, and Neon Noir.
Best for: Marketing materials, social media promo images, and exploring how your film would be marketed.
Variation Workflow for Filmmakers
Here is a practical workflow for exploring visual options for a scene:
Step 1: Generate the Base
Start with a solid prompt that captures your scene. Do not worry about perfect lighting or mood yet - focus on getting the subject and composition right.
Step 2: Explore Camera Angles
Generate 3-4 camera angle variations to find the most compelling perspective. Try Eye Level, Low Angle, and Over-the-shoulder as a starting point.
Step 3: Dial In the Lighting
Take your best angle and try different lighting presets. The lighting should match the emotion of the scene - Golden Hour for romance, Low-key Noir for tension, Neon Glow for urban energy.
Step 4: Set the Color Grade
Apply a color grade that fits your project's visual identity. If you have not decided on a look yet, try Teal & Orange, Filmic/Faded, and Bleach Bypass to see what resonates.
Step 5: Fine-tune with Mood and Weather
For the finishing touch, add a mood preset or weather effect. These final adjustments can elevate a good image to a great one.
Chaining Variations
You can chain variations together by applying one, then applying another to the result:
- Start with a generated portrait at Eye Level
- Apply Low Angle camera variation - now your subject looks powerful
- Apply Neon Glow lighting - the scene has urban energy
- Apply Teal & Orange color grade - it looks like a Hollywood film
- Apply Rainy weather - reflections and atmosphere complete the scene
Each step transforms the image incrementally, giving you fine control over the final result.
Tips for Better Variations
Start with a Strong Base Image
Variations work best when the original image has a clear subject and clean composition. If the base image is messy or confused, variations will inherit those problems.
Use Higher-Quality Models
For variations you care about, use a higher-quality model. FLUX.2 max, Flux Kontext Max, and Nano Banana 2 produce the best variation results because they have more capacity to interpret the style changes while maintaining image quality.
Keep a Consistent Model
When exploring variations for the same scene, stick with the same model. Switching models between variations can introduce inconsistencies in style and character appearance.
Save Your Favorites
As you explore variations, save the ones you like to your assets immediately. It is easy to lose track of a great variation in a long exploration session.
What to Do Next
- Learn all the styles- Deep dive into every category and preset
 AI Image Styles: Camera Angles, Lighting, Color Grading & MoreExplore all 11 AI image style categories in Melies including camera angles, lighting presets, color grades, art styles, moods, and more for cinematic visual storytelling.
 - Generate AI images- Master the basics before exploring variations
 How to Generate AI Images with MeliesLearn how to generate AI images step by step with Melies. Choose from 16 models, write effective prompts, pick the right aspect ratio, and create stunning visuals.
 - Create AI actors- Combine consistent characters with variations for maximum control
 AI Character Generator: Create Consistent AI CharactersUse the Melies AI character generator to create consistent characters across scenes. Browse 148 pre-built AI actors and generate images with the same character every time.
 - Extract subjects- Isolate subjects from your best variations
 How to Extract a Subject from an AI ImageLearn how to extract and isolate subjects from AI-generated images in Melies. Remove backgrounds for compositing, character reuse, and creative workflows.
Visit the
to start generating and exploring variations.