
One of the biggest challenges in AI filmmaking is keeping characters consistent. Generate an image of a detective in scene one, and the same detective might look completely different in scene two. An AI character generator with built-in consistency solves this problem.
Melies includes a library of 148 pre-built AI characters that maintain consistent appearance across every generation. This guide shows you how to use this AI character generator in your projects.
Quick answer: Melies AI Actors are pre-built character profiles with locked-in appearance descriptions. Select one of 148 actors (categorized as Actor, Influencer, or Everyday types), and Melies automatically injects their appearance details into every prompt, keeping the character consistent across all your scenes without manual prompt engineering.
What Are AI Actors?
AI actors are character profiles with detailed appearance descriptions built into them. Each actor includes:
- Gender and age group - Ensuring the right demographic
- Ethnicity tags - For diverse and specific casting
- Detailed description - Physical features, style, and presence
- AI modifier prompt - Technical instructions that get injected into your generation prompt automatically
When you select an actor, Melies adds their appearance details to every prompt you write. Instead of describing what your character looks like each time, you focus on the scene, and the actor handles the rest.
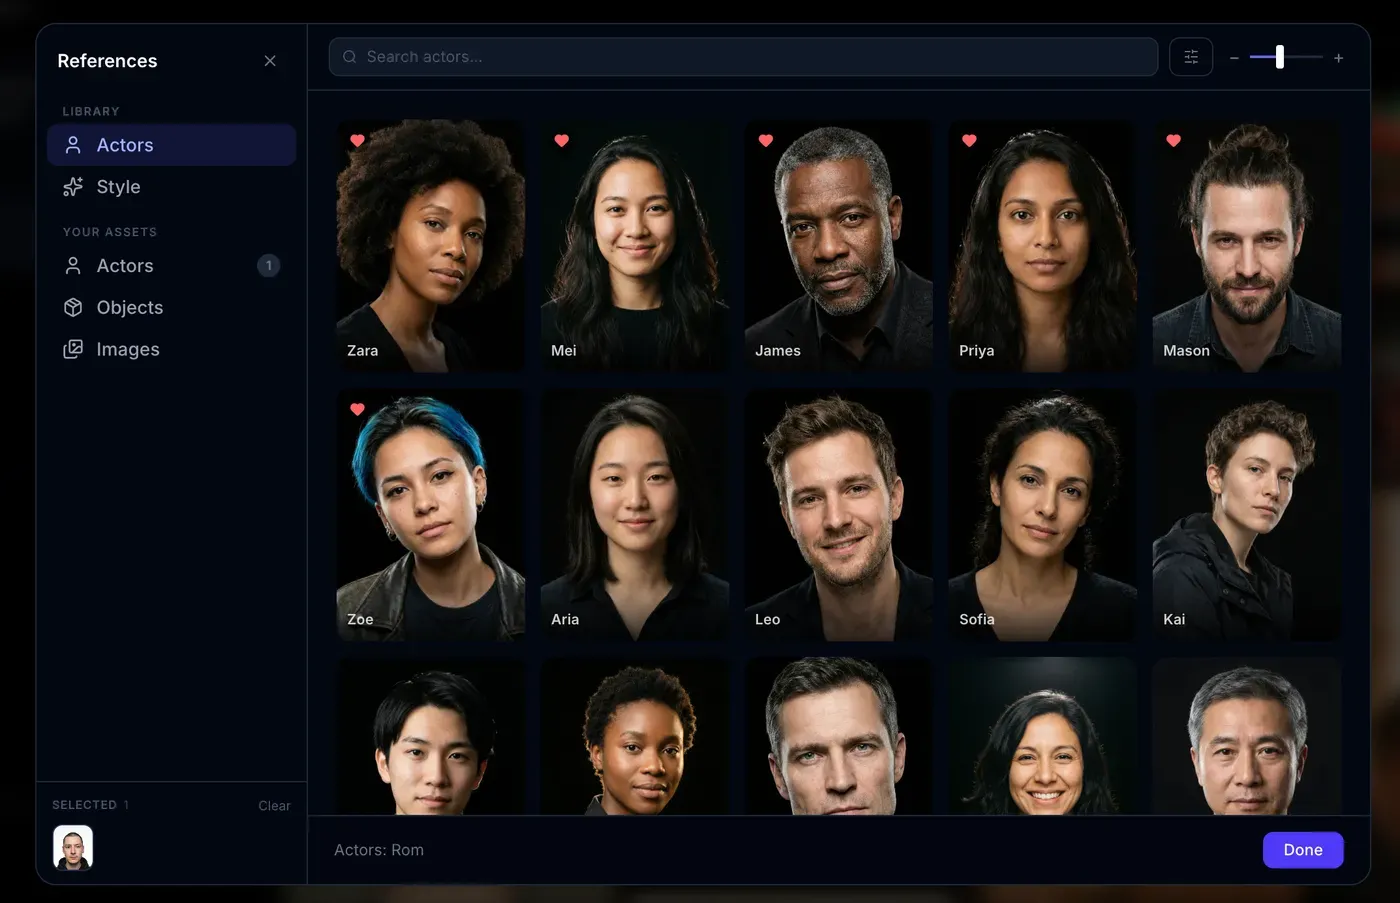
Step 1: Browse the Actor Library
Open the AI actors panel in Melies. You will find 148 actors organized by type:
Actor Type
Characters designed for dramatic scenes and film production. These actors have strong, distinctive features that translate well to cinematic compositions - think leading roles, supporting cast, and background characters with personality.
Influencer Type
Styled for modern social media and digital content. These actors have a polished, contemporary look that works well for marketing materials, social media content, and brand storytelling.
Everyday Type
Realistic, ordinary people designed for authentic scenes. Perfect for documentaries, slice-of-life stories, or any project that needs characters who feel grounded and relatable.
Each actor profile shows a preview along with their demographic details, so you can quickly find the right person for your project.
Step 2: Select Your Actor
Browse through the library and select an actor that matches the character you have in mind. Consider:
- Age group - Does this scene call for a young adult, middle-aged person, or elderly character?
- Type - Are you making a cinematic film (Actor), social content (Influencer), or a documentary-style project (Everyday)?
- Overall look - Does this actor's general vibe match the character in your script?
Click on the actor to select them. Their profile will be applied to all subsequent image generations until you deselect them or choose a different actor.

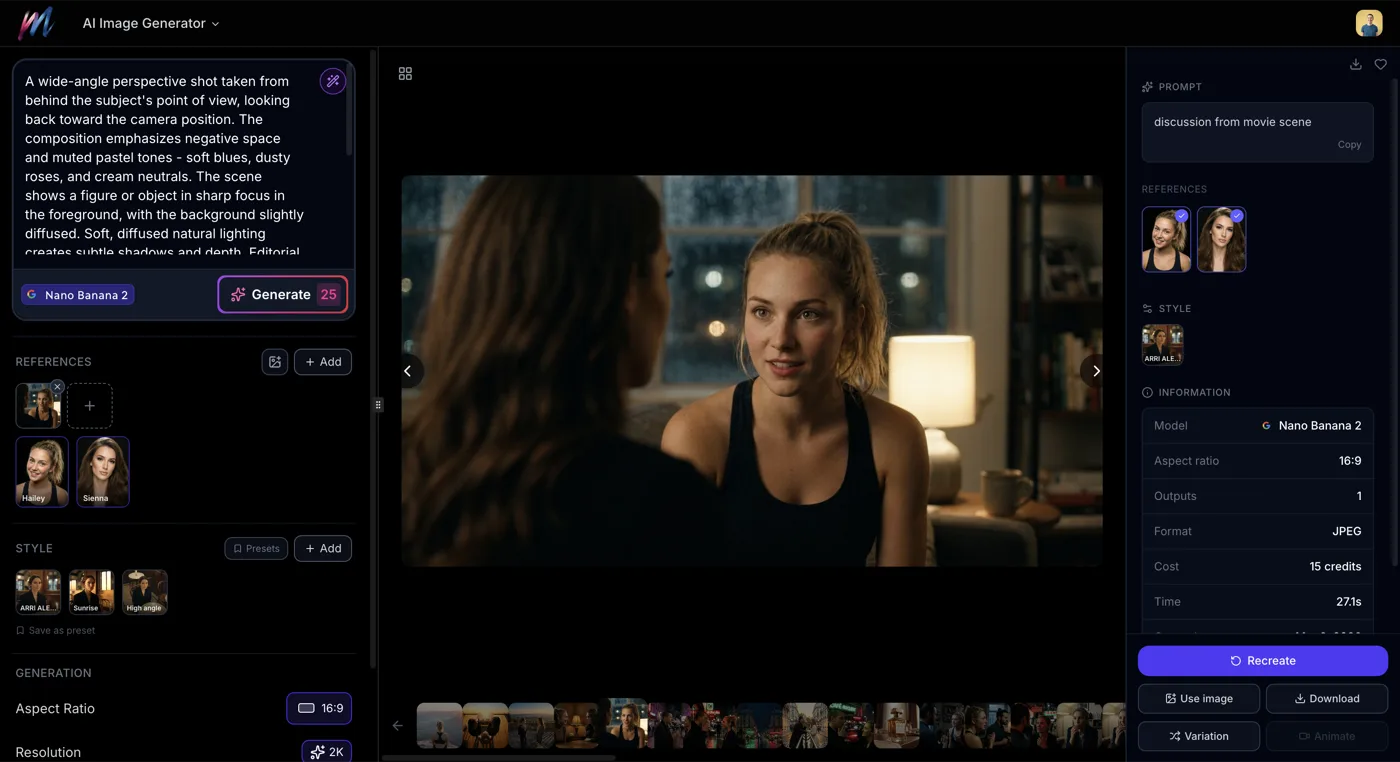
Step 3: Generate Images with Your Actor
With your actor selected, head to the
and write your prompt as usual. Focus on the scene, not the character's appearance:Without an AI actor, you might write:
A tall woman with dark curly hair and sharp features wearing a leather jacket, standing in a dimly lit bar, film noir lighting
With an AI actor, you just write:
Standing in a dimly lit bar, film noir lighting, leather jacket
The actor's appearance details are automatically included. This means your prompt is shorter, more focused, and the character stays consistent every time.

Step 4: Use the Same Actor Across Multiple Scenes
This is where AI actors really shine. When you are building a storyboard or creating scenes for a film, keep the same actor selected and generate different scenes:
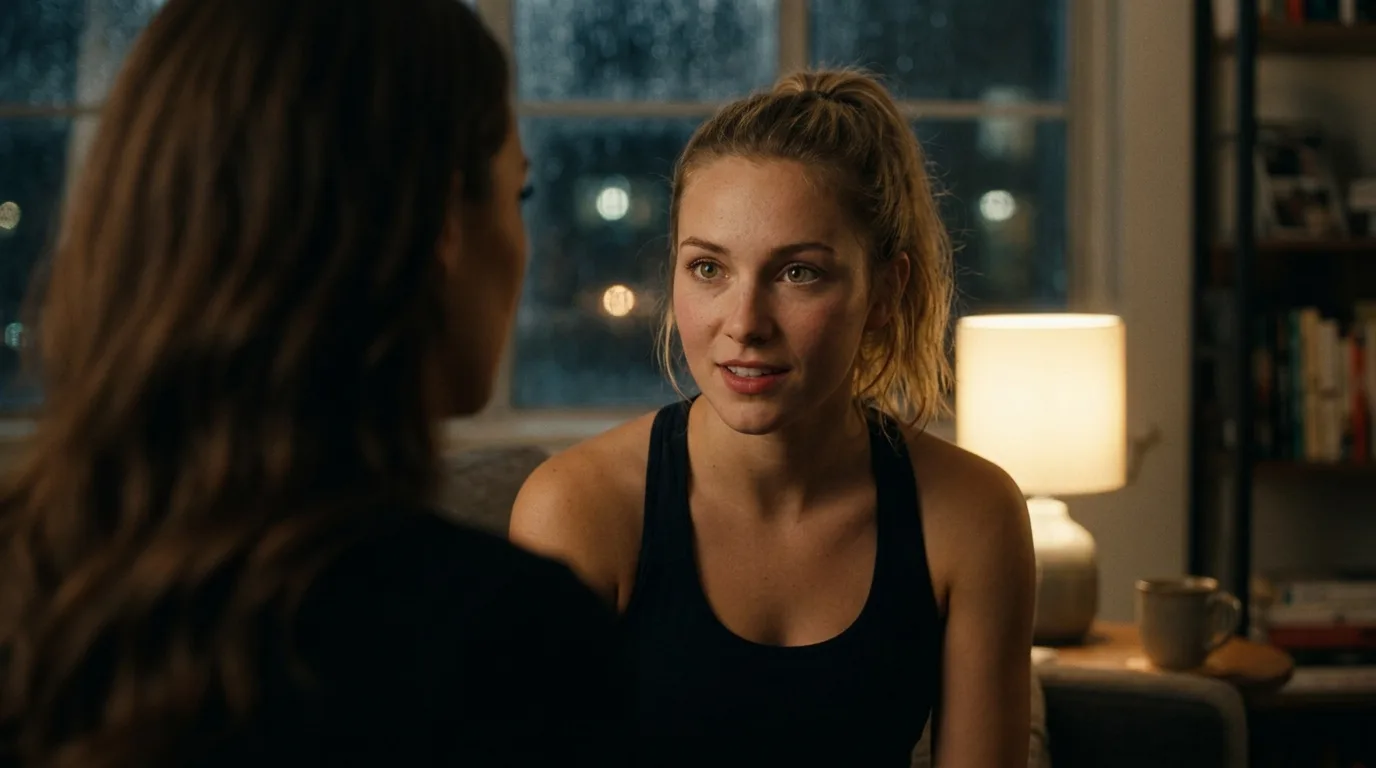
- Scene 1: Walking down a rainy street at night, neon reflections
- Scene 2: Sitting in an interrogation room, harsh overhead lighting
- Scene 3: Standing at the edge of a cliff, golden hour, wind in hair
- Scene 4: Close-up portrait, contemplative expression, soft lighting
Each of these prompts will feature the same character with consistent features. The lighting, setting, and mood change, but the person stays recognizable.

Step 5: Combine Actors with Variations
Once you have a base image with your actor, use the
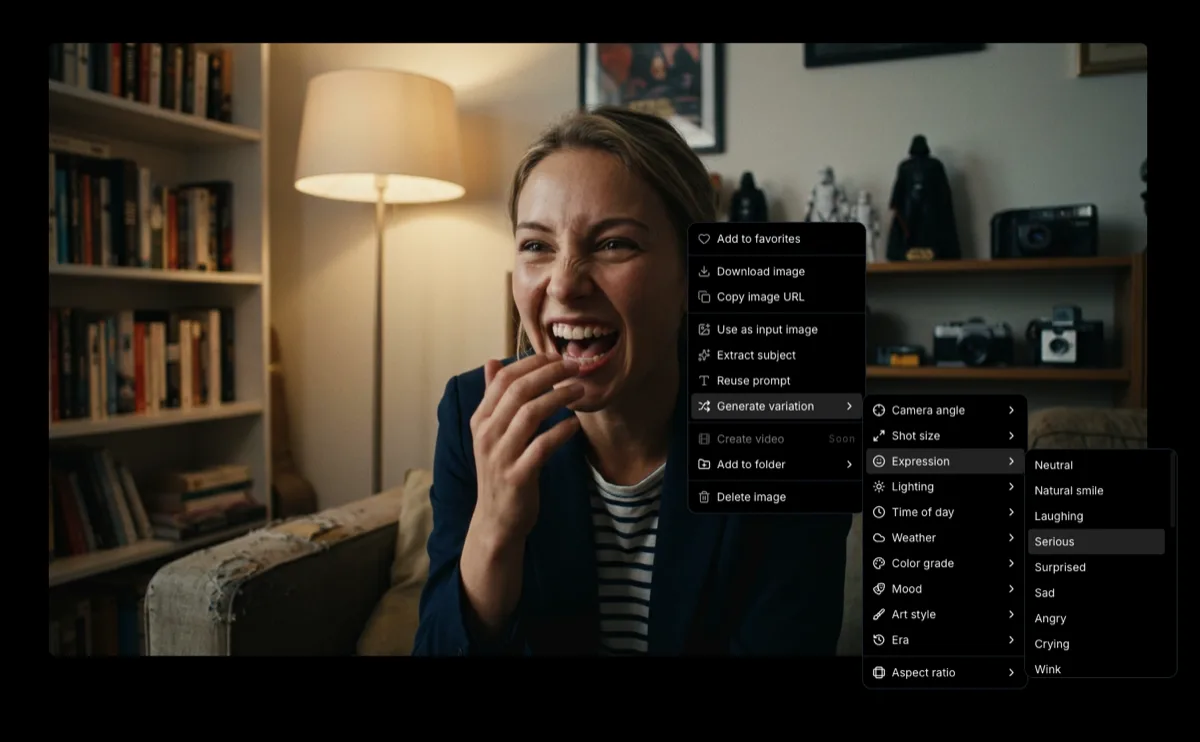
- Camera angles - See your actor from eye level, low angle, over-the-shoulder
- Expressions - Generate the same scene with different emotions (23 expression presets available)
- Lighting - Switch between golden hour, film noir, neon glow
- Color grades - Try teal and orange, monochrome, warm amber

This lets you rapidly explore visual options for a scene without losing character consistency.

Tips for Best Results
Pick Your Model Wisely
Some models handle character consistency better than others:
- Flux Kontext and Flux Kontext Max - Best for maintaining character details across generations
- Seedream 4.5 - Good with diverse characters and skin tones
- Nano Banana 2 - Excellent quality that preserves actor features at high resolution
- FLUX.2 max - Maximum quality, good for hero shots of your characters
Write Scene-Focused Prompts
Since the actor handles appearance, keep your prompts focused on:
- Setting and environment - Where the scene takes place
- Action and pose - What the character is doing
- Lighting and mood - How the scene feels
- Camera angle - Perspective and framing
Build a Cast
For a film project with multiple characters, select different actors for each role and generate all their scenes separately. You can then combine the results in the timeline editor to create scenes with multiple characters.
Use Consistent Styling
While the actor keeps the face and body consistent, you can further improve continuity by:
- Sticking to the same model across scenes
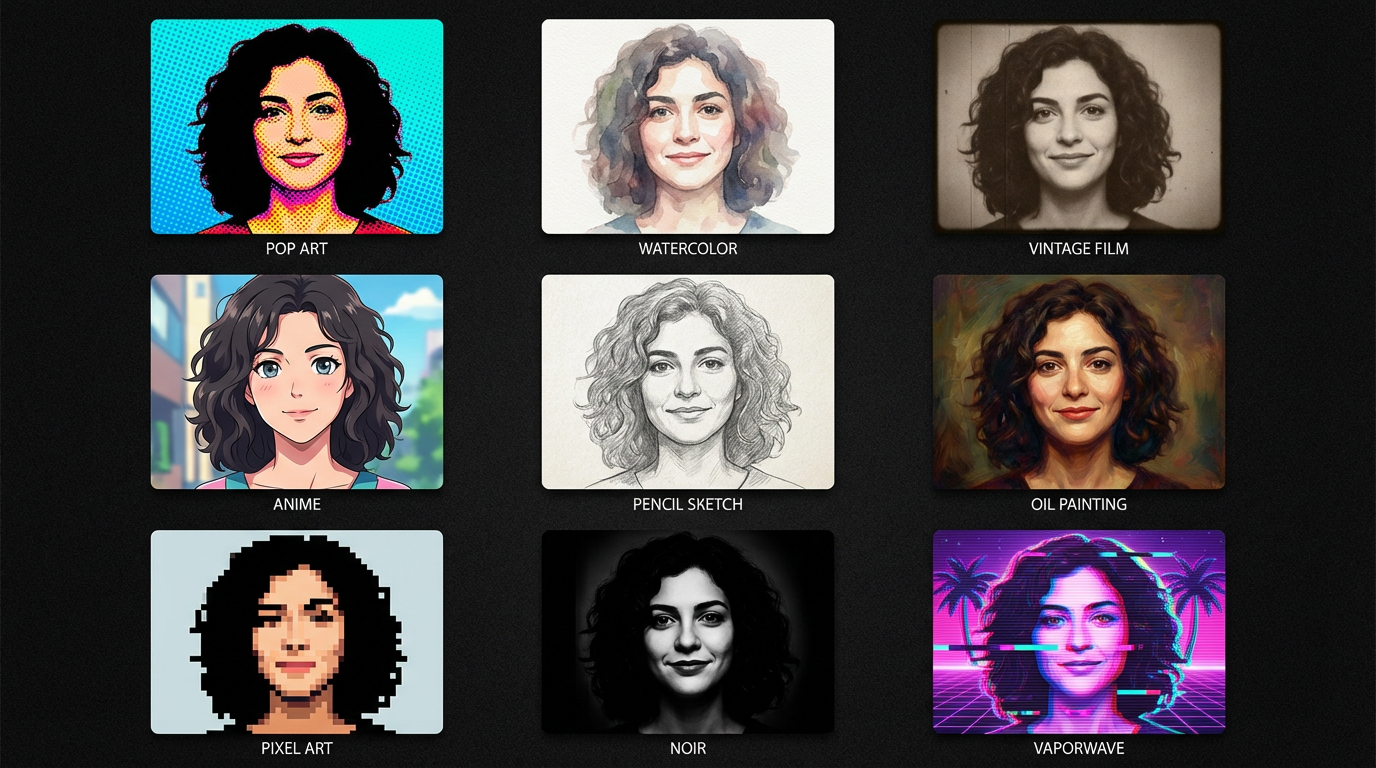
- Using the same art style variation for all generations
- Keeping a consistent color grade throughout your project
From Actor to Film
AI actors are one piece of the Melies filmmaking pipeline. Here is how they fit into a full production:
- - Start with a story concept
- Cast your characters - Choose AI actors for each role
- Generate scene images - Create storyboard frames with your actors
- Generate variations- Explore angles, lighting, and expressionsHow to Generate AI Image VariationsLearn how to generate AI image variations in Melies. Change camera angles, lighting, expressions, color grades, and more from a single base image.
- Create videos- Turn your best images into video clips
 AI Image to Video: How to Turn Any Image into Video with AITurn any AI image into video with Melies. Step-by-step guide to AI image to video generation with 8 models, text-to-video, motion prompts, and cinematic results.
 - Build your film- Edit everything together in the timeline
 AI Filmmaking: How to Create an AI Film from Idea to ExportLearn the complete AI filmmaking workflow with Melies. Generate ideas, cast AI actors, create storyboards, produce video clips, edit on a timeline, and export your finished AI film.
What to Do Next
- Generate AI images- Master the basics of image generation
 How to Generate AI Images with MeliesLearn how to generate AI images step by step with Melies. Choose from 16 models, write effective prompts, pick the right aspect ratio, and create stunning visuals.
 - Explore image styles- Learn about camera angles, lighting, color grades, and more
 AI Image Styles: Camera Angles, Lighting, Color Grading & MoreExplore all 11 AI image style categories in Melies including camera angles, lighting presets, color grades, art styles, moods, and more for cinematic visual storytelling.
 - Create AI videos- Bring your actor's scenes to life with videoAI Image to Video: How to Turn Any Image into Video with AITurn any AI image into video with Melies. Step-by-step guide to AI image to video generation with 8 models, text-to-video, motion prompts, and cinematic results.
- Complete filmmaking guide- Learn the full end-to-end workflowAI Filmmaking: How to Create an AI Film from Idea to ExportLearn the complete AI filmmaking workflow with Melies. Generate ideas, cast AI actors, create storyboards, produce video clips, edit on a timeline, and export your finished AI film.
Visit our
